
For 30 people, you’ll need 22–37 total servings depending on hunger levels. One 9×13-inch sheet cake yields about 24–30 servings—perfect for standard dessert portions. If your crowd’s hungrier, go with a half-sheet cake (54 servings) or two stacked 9×13 pans. Light eaters? One sheet cake covers it. Bake at 350°F for 30–35 minutes. Keep it at room temperature, then cut and serve within four hours. The specifics on sizing combinations and hunger calculations are waiting below.
Start With Hunger Level: Calculate Real Servings Needed

How do you know if you’re buying enough cake? Start by figuring out your guests’ hunger levels. I’ll break this down simply.
Divide your 30 people into three groups: light eaters (0.75 servings), average eaters (1.0 servings), and very hungry guests (1.25 servings). Multiply each group’s size by its portion number, then add everything together.
Say you have 8 light eaters, 15 average eaters, and 7 very hungry guests. Here’s the math: (8 × 0.75) + (15 × 1.0) + (7 × 1.25) = 6 + 15 + 8.75 = 29.75 cake servings. Round up to 30 servings.
This method ensures everyone gets satisfied. You’re accounting for real appetites, not just headcount. Once you know your total cake servings needed, matching pan sizes becomes straightforward.
Quick Answer: Cake Sizes for 30 Guests
For 30 guests, you’ve got several solid options depending on your slice preference. A single half-sheet cake (13 x 18 inches) delivers roughly 25–48 servings based on how you cut it. Want thinner wedding-style slices? You’ll hit your 30 servings easily. Prefer heartier party portions? Pair two standard 9×13 inch layer cakes instead.
If you’re using round cakes, stack two 8-inch rounds together—that gives you about 16–24 servings total. Add a third layer or a smaller cake to guarantee you’ve got enough.
Here’s my move: I always grab a backup cake. Whether it’s a smaller sheet cake or extra rounds, having insurance prevents anyone leaving empty-handed. Your guests appreciate knowing there’s plenty.
Standard Portions: One Slice Per Person
When you’re feeding 30 people, I’ll show you how to figure out what cake size actually works—starting with the basic math of one slice per person. You need to know that standard party slices are about 1 inch by 2 inches, which means a quarter sheet cake (9×13 inches with two layers) gives you roughly 24–30 servings, making it your simplest single-cake solution. If you want extra slices or prefer a bit more cake per guest, a half sheet (13×18 inches) yields 54–72 servings and gives you flexibility without stress.
Calculating Guest Portions
The math behind serving 30 people comes down to one simple idea: most folks eat one slice. You’re planning a gathering where everyone gets a fair portion, and that’s your baseline. At a standard party, you’ll want roughly 0.75 to 1.0 servings per guest for casual cuts. If you’re going bigger with larger party-style slices, bump that to 1.0 to 1.25 servings instead. So for 30 guests, multiply your target number by 30. That gives you 22.5 to 37.5 total servings you need. A quarter-sheet cake handles about 24 servings, while a half-sheet delivers around 48. You’re looking at needing roughly one to two cakes depending on your slice size and how generous you want to be with portions.
Cake Size Recommendations
Now that you’ve got your serving math down, it’s time to pick the right cake size for your 30 guests.
| Cake Type | Dimensions | Servings | Best For |
|---|---|---|---|
| Sheet Cake | 9×13 inches | 24–30 | Tight fit |
| Half-Sheet | 13×18 inches | 54 | Comfortable margin |
| Full Sheet | 18×24 inches | 96 | Generous portions |
| Round Cake | 9-inch | 24 | Smaller groups |
| Round Cake | 12-inch | 38 | Solid coverage |
For 30 people with standard portions, you’re looking at hitting that 30-serving sweet spot. A 9×13-inch two-layer sheet cake gets you there with careful cutting into 2×3-inch slices. Want breathing room? A half-sheet cake gives you 54 servings, so you’re covered comfortably. For round cake lovers, go with a 12-inch round—it yields 38 servings, giving you extra cushion. This approach ensures everyone gets fed without stress.
Hungry Crowds: 1.5 Slices Per Guest

When your guests come hungry and want 1.5 slices each, you’re looking at 45 total slices for 30 people, which means a single 9×13 inch sheet cake won’t cut it. I’d recommend grabbing a half-sheet cake (13×18 inches) that yields around 54 servings, or stacking two 9×13 layers together to hit that 45-slice sweet spot. Either way, you’ll need to think about cake size, slice dimensions, and whether you’re going with one big cake or building up layers to match your hungry crowd’s appetite.
Calculating Total Servings Needed
How do you figure out exactly how much cake you actually need? Start with the basics: multiply your guest count by the slice amount. For 30 people eating 1.5 slices each, you’ll need 45 slices total. That’s your magic number.
Here’s where it gets practical. A standard 9×13 sheet cake gives you roughly 24–28 servings per layer. So you’d want two layers, maybe even three to stay safe. If you’re going with a half-sheet cake measuring 12×18 inches, you’re looking at about 54 servings. That’s plenty of cushion for your crowd.
Always round up. Hungry guests happen. Extra cake beats running short every single time.
Selecting Appropriate Cake Sizes
For a group of 30 hungry guests, you’ve got several solid cake options that’ll get the job done. A single 12-inch round cake delivers 40–50 servings, which covers your crowd with room to spare. If you prefer a 10-inch round, you’ll get 28–38 servings, so pairing two together works perfectly. Want the easiest route? A half-sheet cake measuring 13×18 inches gives you 54–72 servings from standard 2×1 inch cuts.
For hungry crowds eating 1.5 slices per person, I’d recommend one 9×13-inch layer cake as your baseline. Stacking two 9×13 layers offers insurance against bigger appetites and trimming waste. Round up slightly when planning, especially with multi-layer designs. This strategy ensures everyone gets their fill without running short.
Planning Multiple Cake Layers
Why does one 9×13-inch cake fall short when you’ve got 30 guests expecting 1.5 slices each? A single sheet yields only 24–30 servings, leaving you about 15 servings short of the 45 you need.
Here’s your solution: stack multiple layers. Add an extra layer to your 9×13-inch cake, and you’ll boost your servings considerably without changing your cutting pattern. A half-sheet cake with two layers delivers roughly 54 servings when cut into standard 1.5-inch by 2-inch portions—giving you breathing room and leftovers.
Alternatively, bake two 9×13-inch sheet cakes, each with two layers. This approach guarantees you’ll hit your target and lets guests feel welcomed with plenty to choose from. You’re basically creating a spread that says, “There’s enough for everyone here.”
Light Desserts: 0.75 Slices Per Guest

When you’re planning a lighter dessert spread for your gathering, 0.75 slices per guest is your sweet spot. For 30 people, that means you need 22.5 slices total—round up to 23 servings to be safe.
| Cake Size | Typical Servings | Party Slices |
|---|---|---|
| 9×13 inch | 24–30 | 23–28 |
| Two 8-inch rounds | 16–20 | 15–18 |
| Sheet cake | 20–24 | 18–22 |
A standard 9×13 inch sheet cake works perfectly for this group. Each slice measures about 2×3 inches—the ideal party portion size. This approach means your guests get dessert without feeling overstuffed. You’re giving people just enough cake to satisfy their sweet tooth while keeping the meal balanced. One pan handles everything you need.
Round Up Your Total Servings
When you’re feeding 30 people, I’ll walk you through three key steps: first, you calculate your exact guest count (which you’ve already got at 30), then you multiply that number by your portion size—whether that’s the 0.75 slices we discussed for lighter desserts or the standard 1 x 2 inch wedding portions. Finally, I’ll help you pick the right cake size that actually delivers those servings, because ordering too small means disappointed guests and ordering too large means wasted cake.
Calculating Your Guest Total
How do you figure out exactly how much cake you actually need? Start by counting your 30 guests and grouping them by hunger level. Maybe you’ve got 12 people wanting standard portions, 8 wanting larger slices, and 10 wanting smaller ones. Multiply each group by its portion size: 12×1 plus 8×1.25 plus 10×0.75 equals 29.5 servings total. Here’s the key step: round up to 30 servings. This ensures nobody leaves disappointed. If your guests seem equally hungry, the math’s simpler—just 30×1 equals 30 servings. Either way, you’re calculating the actual servings you need before deciding on pan sizes. This straightforward approach prevents both waste and shortages.
Applying Portion Size Multipliers
Once you’ve identified your guest count, it’s time to apply portion size multipliers—the tool that transforms raw numbers into realistic servings. Here’s how I’d approach it for your 30 guests.
Start with your portion size category. Standard portions mean one multiplier of 1.0, giving you 30 servings. Large portions use 1.25, bumping you to 38 servings. Small portions drop to 0.75, requiring just 23 servings.
Now, if your guests aren’t uniform eaters, I’d segment them. Imagine 16 very hungry guests at 1.25 and 14 standard eaters at 1.0. That’s 20 plus 14, equaling 34 servings needed.
Round up your final number. Add a little extra for trimming and carving losses. This buffer keeps you from running short when hunger levels surprise you.
Selecting Appropriate Cake Size
Now that you’ve calculated your actual servings needed—let’s say you landed on 34 servings after accounting for hungry guests—it’s time to pick cake sizes that’ll get you there.
I find the best approach combines two round cakes. One 10-inch round gives roughly 28 cake servings, then I add a 6-inch round for about 8 more. That lands me right around 36 total servings.
Here’s your quick reference guide:
| Cake Size | Layer Height | Approximate Servings | Best For |
|---|---|---|---|
| 8-inch round | Single | 12 | Small groups |
| 10-inch round | Double | 28 | Medium events |
| 12-inch round | Double | 28+ | Larger groups |
| 6-inch round | Single | 8 | Add-on portions |
Pick combinations that match your crowd size exactly. You’ll eliminate waste while ensuring everyone gets cake.
Time of Day Matters: Dessert-Only vs. Full Meal

Why does the time of your party matter when you’re figuring out how much cake to bring? The answer lies in portion sizes and servings. For a dessert-only event, I plan smaller slices—about 1 by 2 inches per guest. This means I need less total cake than a full-meal scenario. I aim for 1.5 to 2 servings per person to keep everyone satisfied with variety.
When cake replaces the main meal, I allocate larger portions around 2 by 2 inches or bigger. This approach covers fewer guests per cake. A 9×13 inch layer gives roughly 14–15 servings, while a half-sheet yields about 25–48 servings depending on cut size.
I always plan a backup cake for 30 people. Appetites vary, and extra coverage prevents running short mid-celebration.
Account for Children vs. Adults

When you’re serving 30 people, you’ll want to figure out how many kids versus adults you’re expecting, since children eat smaller portions than grown-ups do. I recommend planning for about 60–70% adults and 30–40% children, then adjusting your cake size and cutting style based on that mix. With this approach, you can stretch a standard 9×13 sheet cake further by cutting smaller 1 x 2 inch slices for kids while giving adults the typical 1.5 x 2 inch party portions.
Children’s Portion Adjustments
How do you figure out cake amounts when your guest list includes both kids and adults?
Children eat smaller portions than adults do. I plan roughly 0.75 to 1 inch square slices for kids, compared to 1 by 2 inches for grown-ups. This difference matters when calculating total servings needed.
| Guest Type | Slice Size | Servings per Child/Adult |
|---|---|---|
| Children | 0.75–1 inch square | 0.75–1 per child |
| Adults | 1–1.5 inches | 1.0–1.25 per adult |
| Mixed Group | Varied | Adjust by ratio |
When I’m serving 30 people with both kids and adults, I multiply children by 0.75–1 and adults by 1.0–1.25 to reach my target servings. A two-layer sheet cake yields about 24–28 adult servings. With children present, I can stretch one cake further or plan a backup. Cutting smaller child-friendly slices while keeping adult portions larger helps me stay within my cake count.
Mixed Age Group Planning
The real trick to nailing cake amounts for mixed groups is adjusting your serving sizes based on who’s actually eating. I use a serving chart to plan portions strategically. For children, I estimate 0.75 standard servings each, while adults typically need 1.0 to 1.25 servings. This means a child-sized slice runs about 1.5 x 2 inches, slightly smaller than adult portions.
Here’s my approach: I multiply the number of kids by 0.75, then multiply the adults by 1.0 to 1.25. Adding these numbers together gives me my target servings. For 30 mixed-age guests, I aim for 40-50 total servings to stay safe. This usually means ordering one full sheet cake (18×24 inches) plus a smaller half-sheet to buffer any extra demand.
Sheet Cakes: Two 9×13-Inch Pans

For serving 30 people, two 9×13-inch sheet cakes work really well as your main dessert option. Each pan yields about 14–15 servings when you cut standard 2×3-inch portions, giving you roughly 28–30 total servings combined. This setup handles your guest count smoothly without waste.
Here’s what you’ll do: fill each pan about ½ to ⅔ full with batter. Bake both at 350°F, checking doneness at the shortest listed time. Stack the layers once cooled for a classic presentation.
Want flexibility? Cut smaller slices and you’ll stretch those servings further. You could also layer them as a two-layer cake for more height and visual impact. Either way, two 9×13-inch pans deliver exactly what your group needs.
Round Tiered Cakes: Three 6-Inch Layers

Want a cake that looks impressive on the dessert table? Three 6-inch round layers stacked together give you that elegant tiered look. Here’s what you’re working with for servings.
Three 6-inch rounds typically yield 18 to 24 servings, depending on how you slice them. Wedding-style cuts (those smaller 1 x 2-inch pieces) get you around 24 servings total. Party-style portions (0.75 to 1-inch slices) land somewhere between 20 and 28 servings.
For 30 guests, this setup falls a bit short. You’ve got two solid options: cut slightly larger servings and accept fewer pieces, or bump up to a fourth 6-inch layer. Alternatively, add an 8-inch tier on top for those extra portions you need.
Full Sheet Cakes: Serving 49–96 Guests

If you’re feeding a bigger crowd—say, 50 to 100 guests—a full sheet cake is your answer. These cakes measure 18×24 inches and deliver serious serving power with minimal fuss. I’d slice them into standard 2×3 inch portions, which gives you roughly 49–96 servings depending on how generous you feel.
Full sheet cakes at 18×24 inches deliver 49–96 servings with minimal fuss for crowds of 50–100 guests.
Here’s what makes a full sheet cake work:
- Two layers stacked with filling creates height and flavor
- Frosting the perimeters keeps edges clean and slice-ready
- One cake handles 30 people comfortably with leftovers
- You’ll impress your guests with simplicity and abundance
For a 30-person gathering, one full sheet cake leaves you covered. You’re part of a practical baking community that values smart choices over complexity. That’s the real win here.
Half Sheet Cakes: Serving 25–48 People

A half sheet pan measures 13 by 18 inches and holds two cake layers, which gives you roughly 25 to 48 servings depending on how big you cut each slice. I’ll walk you through the pan dimensions, how to calculate the right serving size for your 30 guests, and what batter amounts you’ll need to bake it properly. Let’s figure out which half sheet setup works best for your party.
Half Sheet Pan Dimensions
How do you fit enough cake on one pan for a crowd? A half sheet pan measures 13 by 18 inches—that’s your secret weapon for feeding groups. Here’s what makes this size work so well:
- Standard 2 by 1 inch cuts maximize your servings per pan
- Wedding-style portions let you stretch cake further with smaller slices
- Stacking two layers doubles your capacity without needing extra pan space
- Party-size cutting keeps everyone satisfied with reasonable portion sizes
This standard commercial pan gives you roughly 25 to 48 servings depending on how you slice it. For your 30-person gathering, one half sheet cake delivers exactly what you need. The dimensions let bakers work efficiently while keeping portions consistent across the whole group. You’re not guessing—you’re planning with actual measurements that work.
Serving Size Calculations
Now that you know a half sheet pan’s dimensions, let’s figure out exactly how many people you can actually feed. The serving size calculations depend on how you slice your cake. For wedding-style portions measuring 1 x 2 inches, you’ll get around 25–30 servings from one half sheet. Want to stretch it further? Cut party-sized slices at 2 x 4 inches or 2 x 1 inch tall rectangles instead. You’ll reach 40–48 servings that way. Here’s the practical target: aim for 30–35 servings per half sheet when planning for 30 guests. Your cutting pattern determines everything. Two-layer half sheets work great if you need more total servings. Remember, these numbers guide you, but you control the final count through how you cut.
Batter And Baking Guidelines
So you’ve decided on a half sheet cake for your 30 guests—smart choice. Getting the batter amount right matters. You’ll need roughly 40–48 cups of batter total, which breaks down to about 20 cups per layer for a two-layer cake. This amount fills your pan properly and ensures even baking.
Here’s what you need to know:
- Fill each 9×13 layer ½ to ⅔ full for balanced rise
- Prepare batter in batches if your mixer’s small
- Distribute batter evenly across the pan’s corners and edges
- Check doneness at 30–35 minutes with a toothpick
Measuring accurately prevents undercooked centers or dry edges. Follow your recipe’s batter yield, then scale up or down from there. This approach gives you the right density and texture your guests expect.
Tiered Round Cakes: 8-Inch and 6-Inch Options

When you’re stacking cake tiers to serve 30 people, an 8-inch round paired with a 6-inch round gives you solid flexibility. I’d plan for about 24 servings from the 8-inch tier and 6 servings from the 6-inch tier using conservative cuts. A standard wedding-style cut measures 1 by 2 inches, which works well for most gatherings. The 8-inch tier alone yields roughly 20–28 servings depending on your cut size, while the 6-inch yields 12–16 servings. Here’s the thing: cake height doesn’t change these serving counts within the same pan size. Whether your layers are 3 inches or 4 inches tall, the math stays the same. Just make sure your frosting between tiers is sturdy enough to support the structure and your slicing.
Batter Calculations: Match Pan Size to Cup Requirements

How much batter do you actually need for your pan? I find matching your pan size to batter requirements takes the guesswork out of serving sizes. Here’s what you’re working with:
- A 9×13 inch layer needs 14–15 cups of batter, yielding about 24 servings
- Two-layer sheet cakes require 28–30 cups total for roughly 48 servings
- Full sheet pans (13×18 inches) demand 40 cups for two layers, serving 49–96 people
- Most vanilla recipes produce 10 cups per batch, so you’ll mix 3–4 batches for larger pans
I calculate backwards from your guest count. For 30 people, a standard two-layer 9×13 isn’t quite enough. You’d want a half sheet pan instead, which gives you comfortable serving sizes and prevents running short at your event.
Standard Recipe Yields: 8–10 Cups Per Batch

When you’re planning cake for 30 people, I need you to start by understanding that a standard recipe typically yields 8–10 cups of batter, which becomes your baseline for multiplication. If I’m scaling up from a single batch, I’ll multiply that 8–10 cup yield by however many batches I need to reach my target amount—so for a larger event, you might find yourself making 3 or 4 batches instead of one. This multiplication approach keeps my math simple and helps me figure out exactly how many pan combinations I’ll need to feed your whole crowd.
Batch Multiplication And Planning
Once you know you’re baking for 30 people, the real math begins. I multiply my standard recipe by however many batches I need. Each batch gives me 8–10 batter cups, so I’m calculating total batter cups required by multiplying batches times that range.
Here’s my planning approach:
- Determine your guest count and desired portion size per person
- Divide total portions needed by servings per batch
- Round up to account for seconds and mistakes
- Confirm your oven capacity can handle multiple batches
Let’s say I need 60 total portions for 30 guests (two pieces each). If one batch yields 12 servings, I’ll need 5 batches. That’s 40–50 batter cups total. I’ll scale my ingredients accordingly, then batch-test before committing to the full event.
Recipe Scaling For Large Events
The key to feeding 30 people is matching your batter amount to the right pan size. I recommend making two standard batches, which gives you 16 cups of batter. That’s enough for roughly 16–20 servings in a single 9×13 pan setup, depending on how large you cut each slice.
Here’s my approach: I calculate servings by considering both pan dimensions and slice thickness. A standard batch yields 8–10 cups, so doubling it handles your guest count comfortably. I always add extra batter for larger-than-expected slices or backup portions. Use a cake calculator to convert your cups into specific pan sizes and layer counts. This removes the guesswork and ensures you’re hitting approximately 30 servings without waste.
Batter Volume Per Batch
Most standard cake recipes give you 8–10 cups of batter, and that’s your baseline for scaling up to 30 servings. When you understand batter volume per batch, you’ll know exactly how many batches you need to make.
Here’s what matters when calculating your batter needs:
- Each standard batch yields enough for one 9×13″ layer
- Two layers require 16–20 cups total
- You’ll mix multiple batches back-to-back for efficiency
- Testing your specific recipe prevents surprises
Let’s say you’re making sheet cakes with two layers each. You’d need roughly 16–20 cups of batter per cake. Divide that by your recipe’s yield, and you’ve got your batch count. Always batch-test or check a batter chart for your exact pan size. This groundwork saves you stress and guarantees you’ll feed everyone properly.
Bake Temperatures and Times: Round vs. Sheet Cakes

Getting your cake baked evenly depends on understanding how shape affects heat distribution. Round cakes and sheet cakes behave differently in your oven, which matters when you’re baking for 30 people.
Round cakes bake faster because heat reaches the center more quickly. Sheet cakes, with their larger surface area, need more time. I’ve found that most recipes call for 350°F (175°C), but sheet cakes often bake 5–10 minutes longer than rounds.
| Cake Type | Size | Temperature | Bake Time | Doneness Test |
|---|---|---|---|---|
| Round | 8-inch | 350°F | 30–35 min | Toothpick with moist crumbs |
| Round | 9-inch | 350°F | 35–40 min | Toothpick with moist crumbs |
| Sheet | 9×13 inch | 350°F | 40–45 min | Toothpick with moist crumbs |
| Sheet | 11×15 inch | 350°F | 45–50 min | Springs back lightly |
| Sheet | Large | 350°F | 50–55 min | Heating core optional |
Check doneness with a toothpick in the center for both shapes.
Test for Doneness With the Toothpick Method

How do you know when your cake is actually done baking? The toothpick test is your best friend here. Insert a toothpick into the center of your cake and pull it out. Here’s what you’re looking for:
- A few moist crumbs clinging to the toothpick means you’re good to go
- Wet batter streaking the toothpick means keep baking
- A completely clean toothpick works too, though slightly moist is ideal
- Timing matters—start checking at 40–50 minutes for a 9×13 inch cake at 350°F
If you see wet batter, bake another 5–10 minutes and test again. Remember, different pan sizes and heating cores affect bake time, so don’t rely solely on the clock. Trust the toothpick test instead.
Cool Layers Completely Before Frosting

Now that you’ve nailed the baking, it’s time to let your cake cool down before frosting—and I mean really cool down. Completely cooled layers prevent your frosting from melting and sliding around, which keeps your cake servings looking neat with clean edges. Let each layer reach room temperature after cooling, then chill them for 30–60 minutes before assembly. This temperature drop helps frosting stick better and makes smoothing easier. Place layers on level surfaces during cooling to prevent warping that’ll throw off your cake’s shape. Once they’re fully cool, wrap each layer tightly in airtight film. This keeps moisture locked in and stops crusting. You’re protecting all that work you’ve done, ensuring your cake servings turn out professional and stable.
Prepare Frosting One Day Ahead

Why wait until the last minute when you can prep your frosting the day before? I’ll whip my buttercream until it’s smooth and fluffy, then store it covered in the fridge overnight. This approach gives you breathing room before your big event.
Here’s what I do to stay organized:
- Whip buttercream to fluffy consistency the day before
- Store in an airtight container in the fridge for up to one week
- Bring frosting to room temperature before rewhipping
- Chill slightly after layering for clean edges during transport
When you’re ready to frost, I simply take the buttercream out and let it warm up. Then I rewhip it until it’s spreadable again. This method keeps everything manageable and reduces day-of stress.
Frosting Amounts for 30-Person Cakes

Once your buttercream is prepped and chilling, you’ll want to figure out exactly how much frosting you actually need for 30 people. For a 9×13 inch two-layer cake serving around 24–30 party servings, you’re looking at roughly 3–4 cups of buttercream total. This covers a basic layer, filling, and simple border work.
If you’re scaling up to a half-sheet cake with 54 potential servings, bump that to 5–6 cups. The math is straightforward: more servings mean thicker frosting applications and decorative elements that demand extra buttercream.
I’d recommend making your frosting a day ahead so it’s properly chilled and easier to work with. Cold buttercream spreads smoother and holds details better, giving your cake that polished look your guests deserve.
Tiered Cake Stability: Dowels, Supports, and Stacking Height
Building a tiered cake that actually stays upright takes more than just stacking layers on top of each other. I’ll walk you through the support system that keeps your cake servings stable and impressive for 30 guests.
You need dowels—wooden or plastic rods that transfer weight downward. Here’s what makes the difference:
- Place dowels in a grid pattern through each tier
- Use a cardboard cake board between layers to distribute load
- Space dowels based on tier diameter for maximum stability
- Make your bottom tier thicker with larger-diameter dowels
Chill your layers before stacking. Add an icing dam between tiers for grip. Avoid soft fillings that compress under pressure. Taller cakes need longer dowels positioned closer together. This foundation ensures your tiered creation serves your guests without disaster.
Buttercream Flavor and Color Options

Once you’ve nailed down your cake structure and support system, you can focus on making it visually stunning and delicious with buttercream flavor and color choices. I’ll walk you through classic options like vanilla, chocolate, and cream cheese buttercream, plus how to mix custom colors that match your party theme or personal taste. These decisions directly affect how much buttercream you’ll need, since some flavors are denser than others and certain color combinations might require extra batches.
Classic Buttercream Flavors
What’s the easiest way to make your cake taste amazing? Buttercream is your answer. I’ll show you four classic flavors that’ll make your guests feel right at home:
- Vanilla buttercream delivers smooth, creamy texture perfect for stacking
- Chocolate buttercream adds rich depth to any celebration
- Almond buttercream brings subtle sophistication to the table
- Strawberry buttercream creates nostalgic, crowd-pleasing vibes
To elevate your buttercream, I add extracts at 1–2 teaspoons per batch. Vanilla, almond, and lemon work great. A pinch of salt balances the sweetness, preventing that one-note taste.
These flavors aren’t just delicious—they’re forgiving. Buttercream crusts and sets at room temperature for several hours, so you’re not stressed about timing. You’re joining a long tradition of bakers who trust these reliable, beloved flavors to impress their guests.
Custom Color Combinations
How do you turn a basic buttercream into something that matches your party’s vibe? Custom color combinations let you create exactly that. When you’re serving 30 people, coordinating your frosting colors matters. Pick a frosting base color first—this covers your entire cake. Then add accent colors through borders, piping, and fillings. These accents tie everything together visually.
Start by deciding your color scheme before baking. Gel food coloring works best for buttercream since it won’t thin out your frosting like liquid dyes do. Mix colors thoroughly to avoid streaks. Your custom combination should reflect your party theme, whether that’s elegant pastels or bold brights.
Plan your color strategy early. This prevents last-minute frosting batches and ensures all 30 servings look cohesive and intentional.
Freeze Baked Layers Up to One Month

Need a head start on your cake prep? Freezing baked layers saves you time when you’re planning servings for 30 people. I wrap my cooled layers tightly in plastic wrap, then foil, and store them flat in the freezer for up to one month. Here’s my freezing strategy:
- Label each wrapped layer with flavor and date for easy tracking
- Keep oldest layers first to maintain freshness rotation
- Thaw at room temperature or in the refrigerator before decorating
- Level layers if needed after thawing
I only freeze the cake layers themselves, not the frosted cake. This keeps frosting intact and makes transport easier. Ensure layers are completely cooled before wrapping to prevent condensation and soggy frosting. This approach works perfectly for sheet or layer cakes.
Thawing Frozen Layers: Timeline and Best Practices

When you’re ready to use those frozen layers, I’ll walk you through the thawing process to keep your cake fresh and your frosting intact. You can thaw in the refrigerator (slower but safest) or at room temperature for 4 to 6 hours, and I’ll explain how to prevent that annoying moisture buildup that makes cakes soggy. The key is controlling the temperature and avoiding shortcuts like microwaves or ovens, which can damage your cake’s texture before your guests even arrive.
Refrigerator Thawing Duration
If you’ve frozen your cake layers ahead of time, I’ve got good news: thawing them is straightforward, though it does require patience. Your thawing time depends on layer size and thickness. Here’s what you need to know:
- A standard 9×13 inch sheet layer (about 2 inches tall) needs 24 to 48 hours in the fridge
- Larger sheets or multi-layer cakes require 2 to 3 days for even thawing
- Keep layers wrapped in plastic on a tray to catch condensation
- Never thaw at room temperature—move straight from freezer to fridge
This fridge-to-table approach preserves moisture and keeps your frosting stable during assembly. Planning ahead means your cake reaches that perfect, even consistency when you’re ready to build it.
Room Temperature Methods
While the fridge takes patience, room temperature thawing works when you’re short on time—just with a few strings attached. I’d unwrap those frozen cake layers and place them on a plate or rack for 1–2 hours, or 2–3 hours for larger, denser layers. The key? Keep them wrapped in plastic wrap to prevent condensation from turning your cake into a soggy mess.
You’ll want those layers reaching about 68–72°F before frosting or stacking for cake servings that look polished. If you’re really pressed, try thawing for 45–60 minutes at room temperature, then pop them in a 200°F oven for 5–10 minutes to even out the temperature.
Once thawed, refrigerate or frost within 24 hours to keep everything fresh.
Preventing Moisture And Damage
How do you keep thawing cake layers from turning into soggy disappointments? I’ve learned that preventing moisture damage requires a strategic approach when working with frozen layers.
Here’s what I do:
- Thaw layers in the refrigerator overnight or at room temperature for 1–2 hours, depending on thickness
- Keep layers wrapped in plastic, then foil, thawing flat to prevent warping and moisture buildup
- Thaw in their pan or on a rigid board to maintain stability and avoid stacking while partially frozen
- Frost within 24 hours once thawed, storing at room temperature with buttercream or refrigerating with perishable fillings
Before transport, I wrap layers securely and use non-slip mats. Cooling everything completely before moving to your venue minimizes moisture transfer. These steps ensure your cake arrives in perfect condition for your 30 guests.
Pro Tips: Level Layers and Create a Crumb Coat

Getting your cake layers perfectly level is one of those game-changers that separates a wobbling disaster from a stable masterpiece. I level my layers using a serrated knife or cake leveler, which creates an even surface for stacking. This step matters because uneven layers shift during transport and ruin your cake servings presentation.
| Step | Action | Time |
|---|---|---|
| 1 | Bake layers at same height | Per recipe |
| 2 | Cool completely | 1-2 hours |
| 3 | Level with knife | 5 minutes |
| 4 | Apply crumb coat | 10 minutes |
| 5 | Chill before final frosting | 30 minutes |
I apply a thin crumb coat—about 1/8 inch thick—to seal loose crumbs. Then I chill the cake 30 minutes before final frosting. This technique ensures neat slices for all 30 servings and prevents shifting during assembly and transport.
Why 30 Minutes Matters for Your Crumb Coat

Why does that 30-minute window matter so much? I’ve learned this timing is crucial for nailing your crumb coat. Here’s what happens in those 30 minutes:
- Your frosting firms up just enough to support the final layer without smearing
- Crumbs stay sealed in place instead of mixing into your top coat
- You avoid the frustration of a crust forming too early
- Your cake’s surface becomes the perfect foundation for smooth frosting
When I rush past 30 minutes, the crumb coat dries too hard and cracks. That makes applying the final layer way harder. But if I apply frosting too soon, crumbs break loose everywhere.
Temperature and humidity affect this timing too. Warmer, humid kitchens need extra minutes. I watch my frosting’s texture and adjust accordingly. That 30-minute sweet spot keeps your cake looking polished and professional.
Decorating a Cake for 30: Time and Labor Estimates

Once you’ve settled on your cake size and structure—whether that’s a single 12×18 inch sheet cake, multiple 9×13 inch layers, or a combination of round tiers—you’re ready to tackle the decorating phase, which is where your real time investment happens. Plan for 1.5 to 3 hours total. This includes your crumb coat, final frosting layer, and any piping or borders you’re adding. Heavier, taller designs with multiple tiers need extra time since you’re building complexity. Start by applying that crumb coat, then chill it. Next comes your final frosting pass. For cake servings around 30, you’ll want to pace yourself. Budget more time if you’re adding intricate details. Keep your workspace organized and your tools ready. You’ve got this covered.
Transporting Your Cake: Storage and Temperature Control
You’ve spent hours decorating your masterpiece, and now comes the part that makes or breaks everything: getting it to the venue in one piece.
Proper storage and temperature control keeps your cake servings looking fresh and tasting great. Here’s what I do to transport successfully:
- Wrap cooled layers tightly in plastic wrap, then foil, and freeze them ahead of time
- Use sturdy half-sheet boxes with non-slip mats for stability during transport
- Apply a thin frosting layer before moving to help everything stay put
- Let cakes reach room temperature before serving to maintain texture and cutting ease
Bake and cool your layers flat and uniform. This ensures clean assembly at the venue. Plan for backup cake servings—extra coverage beats running short with 30 guests depending on you.
Serving at Room Temperature for Best Flavor
The magic happens when cake reaches room temperature. I’ve found that baking and frosting layers a few hours ahead, then storing them in a cool, breathable container, lets flavors truly shine. Your cake serving size matters here—buttercream-frosted cakes stay fresh at room temperature for up to two days, making planning easier.
| Cake Format | Servings | Time to Peak |
|---|---|---|
| 9×13 single layer | 14–15 | 2–3 hours |
| Two 9×13 stacked | 28–30 | 2–3 hours |
| Half-sheet (12×18) | 54 | 2–3 hours |
For 30 guests, a stacked 9×13 or half-sheet works perfectly. Let your cake sit out before serving—this simple step transforms texture and taste. Avoid perishable fillings unless you’re keeping everything chilled. Room temperature serving isn’t just convenient; it’s actually better.
Cut and Serve Within Four Hours of Removal
How do you keep your cake fresh while serving 30 people?
I find that baking a sturdy 4-inch-high cake works best for quick service. You’ll want to cut and serve within four hours of removal from the refrigerator. This timing keeps your cake fresh and prevents frosting from melting.
Here’s what I recommend:
- Plan party-sized cuts at 1.5 x 2 inches for clean, even servings
- Use a sharp knife dipped in hot water between cuts
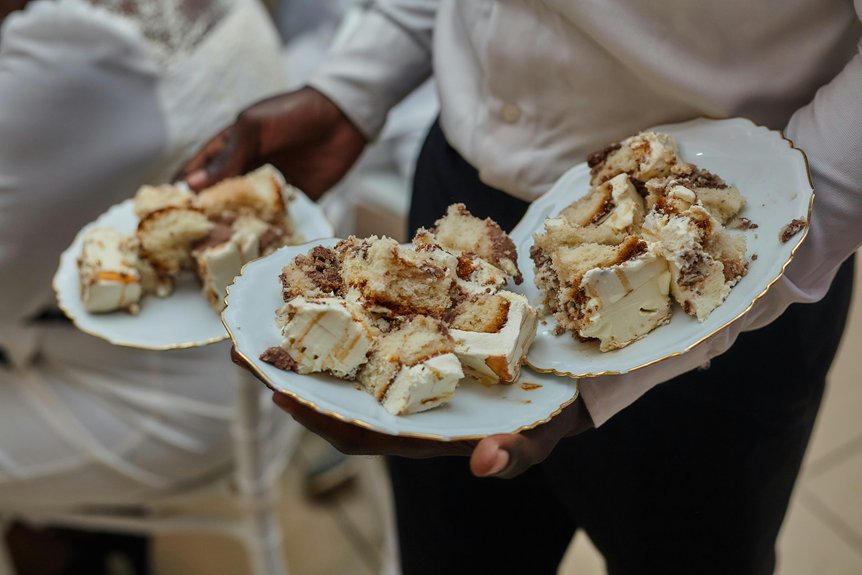
- Arrange pre-cut slices on platters to streamline service
- Keep unused portions covered and cool
A two-layer 9×13 cake yields roughly 28–30 party servings with these cuts. Your guests appreciate the efficiency. You’re serving them quality cake at its peak freshness. That’s the sweet spot for hosting confidently.