A cake bar is a tender, airy dessert that rises with baking powder or soda—way different from dense brownies. You’ll mix dry ingredients like flour and baking powder, combine wet ones like plant milk and oil, then fold them together gently. Bake at 350°F for about 25 minutes in a 9×13 pan until a toothpick comes out clean. Cool completely, frost if you want, then slice into squares. They’re perfect for potlucks since they transport easily. There’s plenty more to explore about variations and storage tips.
Cake Bars vs. Brownies: What’s the Difference?

Ever wondered why some bar desserts taste like cake while others feel dense and fudgy? That’s because cake bars and brownies are fundamentally different treats.
Cake bars use baking powder or baking soda to rise, creating a lighter, airier crumb structure. Brownies, however, rely mainly on eggs for their lift, resulting in that signature dense, fudgy texture you’re craving.
Here’s another key distinction: cake bars often feature toppings, fillings, or multiple layers—think glazes and frostings creating distinct presentations. Brownies typically stay simple, skipping the layered finishes.
The portability factor matters too. I find cake bars perfect for potlucks and gatherings because they’re designed for easy slicing and transport. Brownies work great too, but cake bars give you that actual cake experience in convenient bar form. Choose based on whether you want light and layered or dense and decadent.
What You Need to Make Cake Bars

Why do some bakers swear by cake flour while others stick with all-purpose? The truth is, both work for cake bars. I’ll walk you through everything you need.
| Ingredient | Purpose | Notes |
|---|---|---|
| Flour | Structure | Cake or all-purpose flour works |
| Baking powder/soda | Lift | Creates tender crumb |
| Fat | Moisture | Oil or vegan butter |
| Plant-based milk | Liquid | Binds ingredients together |
| Vanilla or zest | Flavor | Enhances taste profile |
To make your bars, grab a 9×13 pan and line it. Whisk your dry ingredients separately from your wet ones. This prevents lumps in your batter. Combine everything together, pour into your pan, and bake. Once cooled, add frosting or toppings. You’ve got portable desserts ready to go.
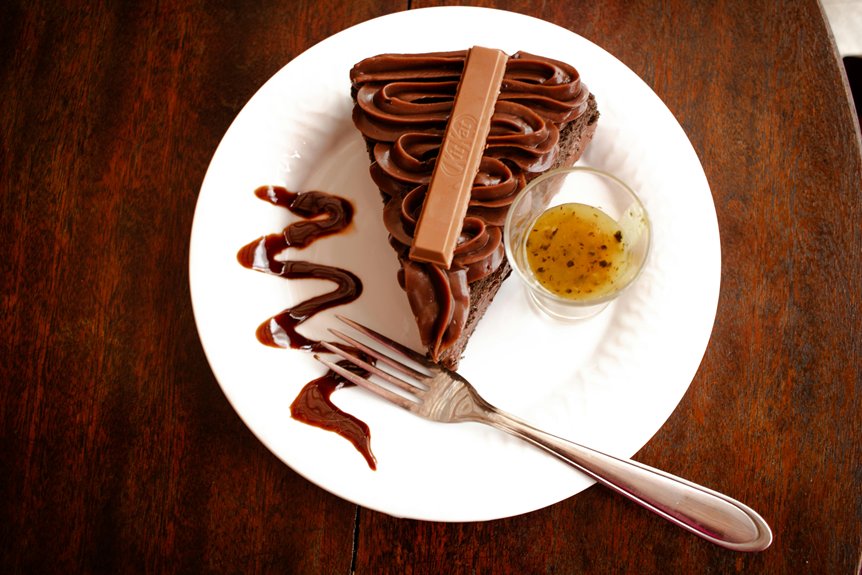
How to Bake Chocolate Cake Bars: Step-by-Step

Ready to bake chocolate cake bars from scratch? First, preheat your oven to 350°F and line a 9×13-inch pan with parchment paper. Whisk your dry ingredients—flour, coconut sugar, baking powder, baking soda, and salt—in one bowl. In another bowl, combine plant milk, melted coconut oil, and vanilla, then add apple cider vinegar for tenderness. Mix the wet and dry ingredients together until just combined. Pour the batter into your prepared pan and bake until a toothpick comes out clean. Cool completely before frosting. Once set, cut your chocolate bars into 24–36 squares using a hot knife for clean edges. Store unfrosted bars at room temperature for up to two days, or refrigerate frosted bars for five days.
Frosting and Fillings for Cake Bars

What makes a cake bar truly special? The frosting and fillings you choose. I’ve found that layering these components creates contrast and keeps your bars moist.
| Frosting Type | Best Pairing | Texture Result |
|---|---|---|
| Buttercream | Vanilla cake | Smooth, creamy |
| Cream cheese | Chocolate cake | Rich, tangy |
| Chocolate ganache | Yellow cake | Glossy, fudgy |
| Lemon curd | Vanilla cake | Bright, tart |
| Salted caramel | Brown sugar cake | Sweet, buttery |
I recommend spreading frosting evenly, then refrigerating for 30 minutes before serving. This prevents melting and sets the texture properly. For extra moisture, I add jam or compote between layers. Dust with powdered sugar after cooling for a simple finish. These techniques transform basic bars into bakery-quality treats you’ll feel proud serving.
Gluten-Free and Nut-Free Cake Bar Recipes

Once you’ve mastered the frosting techniques that make your cake bars shine, you’re ready to expand your baking skills to include dietary variations. I’ll show you how to create delicious gluten-free and nut-free cake bars that everyone enjoys.
Making gluten-free cake bars requires smart swaps and careful attention:
- Use gluten-free 1:1 flour blends to replace regular flour directly
- Add xanthan gum or guar gum for binding if your blend lacks it
- Check that your baking powder and baking soda are fresh for proper lift
- Balance moisture carefully since gluten-free batters behave differently
For nut-free versions, I substitute pumpkin seeds, sunflower seeds, or tahini instead of tree nuts. These alternatives add texture and nutrition without allergen concerns. Your friends and family with dietary restrictions will appreciate having delicious cake bars they can safely eat.
Seasonal Cake Bar Flavors

I’ll show you how to transform your cake bars throughout the year by matching flavors to what’s fresh and in season. Spring brings bright options like lemon lavender with blueberries and strawberry rhubarb, summer calls for tropical twists such as coconut lime and peach cobbler-style, and fall and winter invite warming spices like pumpkin maple and gingerbread with cream cheese frosting. Each seasonal variation uses your standard cake bar technique—batter, bake, cool, frost—but swaps in produce and flavor pairings that make your desserts feel perfectly timed for holidays and potlucks.
Spring Flavor Inspirations
How can you capture the fresh energy of spring in a single dessert? I’m drawn to flavors that celebrate the season’s best ingredients. Spring cake bars shine when you combine bright, seasonal tastes with simple techniques.
Here’s what I focus on:
- Lemon and citrus zest – adds brightness and cuts through richness
- Fresh berries – strawberries and blueberries provide natural sweetness and moisture
- Floral notes – lavender or elderflower create delicate, sophisticated flavor
- A light glaze – ties everything together while keeping bars fresh-tasting
I bake these bars at 350°F for 20–25 minutes until golden. The key is balancing tart and sweet. A simple powdered sugar dusting or whipped cream topping works perfectly. These combinations feel celebratory without being heavy, making spring cake bars ideal for sharing with others who appreciate seasonal eating.
Autumn And Winter Variations
When the weather turns cooler, cake bars shift toward deeper, spicier flavors that feel cozy and satisfying. I love how autumn variations embrace warm spices like cinnamon, nutmeg, and cloves paired with rich toppings. Popular seasonal flavors include pumpkin spice with maple frosting, apple cinnamon with caramel drizzle, and chai-spiced varieties with vanilla frosting.
Winter cake bars lean into peppermint chocolate, gingerbread, and orange cranberry combinations. You’ll use ingredients like pumpkin puree, apple butter, or molasses to create that bakery-style taste at home. For presentation, I drizzle generous amounts of caramel or chocolate across the top. A cinnamon sugar dusting adds that seasonal touch. These variations deliver comfort in every bite during colder months.
Summer Tropical Combinations
What makes summer cake bars different from their cozy cousins? They’re bright, revitalizing, and bursting with tropical vibes. I love how these bars capture the essence of warm-weather baking with flavors that feel like a mini vacation.
Here’s what makes them special:
- Coconut, pineapple, and lime create that signature tropical punch
- A single 9×13 pan baked at 350°F for easy preparation
- Citrus glazes or cream cheese frosting add moisture and brightness
- Mix-ins like shredded coconut and pineapple chunks scattered throughout
The magic happens when you combine a coconut-lime base with pineapple-studded filling or mango swirls. After baking, cool completely, then finish with powdered sugar dusting or a citrus glaze. These bars deliver portable, revitalizing treats perfect for summer gatherings and picnics.
Why Cake Bars Dry Out (And How to Fix It)

Ever bitten into a cake bar that felt more like cardboard than cake? I’ve been there. Dryness happens when you overbake, use too much flour, or skimp on fat and liquid in your batter.
Here’s how I fix it. First, use the toothpick test—insert one into the center, and it should come out with a few moist crumbs. Pull them out early rather than late. Second, measure flour precisely by spooning it into your cup, not scooping. Third, check your oven temperature with a thermometer since ovens lie.
I also add coconut oil instead of butter for better moisture retention. A splash of extra liquid or acidic ingredients like yogurt helps too. Finally, don’t overmix your wet and dry ingredients together. Gentle folding prevents dense, dry crumbs from forming.
How to Store Cake Bars

Storage makes or breaks a cake bar’s shelf life, so let’s talk about keeping yours fresh. Here’s how I store mine for maximum enjoyment:
- Cool completely before frosting to prevent melting or sliding toppings
- Keep unfrosted bars at room temperature for up to 2 days, or refrigerate for 5 days
- Store frosted bars at room temperature for 2–3 days, or refrigerate for up to 5 days
- Freeze unfrosted bars for up to 3 months in an airtight container
Your frosting type matters too. I refrigerate cream cheese and ganache frostings, but simple glazes and powdered sugar handle room temperature just fine. Always use an airtight container to maintain texture and moisture. When you’re ready to serve, that hot knife technique keeps everything looking sharp.
Easy Cake Bars From Box Mix

I’ll show you how to make cake bars using a box mix—it’s quick, customizable, and stores well for days. You just combine the dry mix with melted butter and eggs, fold in whatever mix-ins you like (M&Ms, chips, sprinkles), then bake at 375°F for about 25 minutes. Once they’re cooled, you can cut them into 24–36 pieces and keep them in the fridge or at room temperature depending on your preference.
Quick Mix Convenience
Looking for the fastest route to homemade cake bars? Box mix offers incredible versatility and speed. I can transform a standard cake mix into delicious bars in under an hour with minimal effort.
Here’s my quick process:
- Preheat your oven to 375°F and grease a 9×13 pan
- Mix the cake mix with melted butter and eggs until combined
- Spread batter evenly and bake for about 25 minutes until set
- Cool completely before slicing into bars
The real magic happens with add-ins. I fold in M&Ms, sprinkles, peanut butter chips, or Reese’s Pieces for flavor variations. After baking, I top with frosting or ganache for extra appeal.
These bars work perfectly for potlucks and gatherings. The versatility means I can switch up flavors easily without complicated recipes. Box mix convenience doesn’t sacrifice quality or taste.
Customizable Mix-In Options
While the basic box mix method gives you a solid foundation, the real fun starts when you fold in your favorite mix-ins before baking. I love transforming simple bars by adding texture and flavor to my batter. You can swirl in fruit preserves, sprinkle chocolate chips throughout, or layer toffee bits for crunch. The options keep your box mix bars exciting and personalized.
| Mix-In | Best For |
|---|---|
| M&Ms | Colorful, sweet bites |
| Peanut butter chips | Rich, nutty flavor |
| Coconut | Tropical texture |
| Nuts | Satisfying crunch |
Fold mix-ins gently into your batter before spreading into the 9×13 pan. Bake until a toothpick comes out clean. These customizable bars transform basic box mix into something that feels entirely yours. Experimenting with different combinations keeps baking fun and prevents monotony.
Storage And Serving Tips
How long do cake bars actually stay fresh? I’ll break down the timeline for you.
Unfrosted bars last up to 2 days at room temperature or 3 months frozen. Frosted bars stay best at room temperature for 2–3 days, or refrigerated for about 5 days. Here’s my storage strategy:
- Cool bars completely before frosting them
- Refrigerate frosted bars for 30 minutes to set the frosting
- Freeze unfrosted bars in advance, then frost after thawing in the refrigerator
- Transport bars in airtight containers to prevent drying out or sticking
I find this approach keeps my bars fresh and ready whenever I need them. Planning ahead means I can prep the baking portion days earlier, then add that final frosting touch right before serving or heading to an event.