Yes, you can skip baking soda and use baking powder instead—it’s your main leavening agent. Grab very ripe bananas with brown spots, room-temperature eggs, brown sugar, and self-rising flour, which already contains baking powder and salt. Mix your dry ingredients separately, then combine with mashed bananas and eggs using the muffin method—stop mixing once flour disappears to avoid a dense crumb. Bake at 350°F for 55–60 minutes in an 8×4 loaf pan. There’s more technique that’ll help you nail it perfectly.
Can You Make Banana Bread Without Baking Soda?

Sure, you can make banana bread without baking soda—it’s totally doable. Here’s what you need to know: self-rising flour is your easiest shortcut since it already contains baking powder and salt built in. Just swap it for regular all-purpose flour one-to-one.
If you’re sticking with all-purpose flour, add about 1.5 teaspoons of baking powder plus 1/4 teaspoon salt per cup of flour. These leavening agents help your banana bread rise properly and create that fluffy crumb structure you’re after.
Skip the leavening entirely, and your loaf will be denser. But don’t worry—ripe bananas bring plenty of moisture and flavor to compensate. Baking soda does enhance browning, so expect a slightly different color without it. Your banana bread will still turn out delicious.
Choose Ripe Bananas With Brown Spots

I’m going to show you how to spot when your bananas hit peak ripeness and what to do if you end up with extras. You’ll want those bright yellow skins covered with brown spots—that’s when bananas deliver the strongest flavor and natural sweetness your banana bread needs. If you’ve got overripe bananas on hand, just peel, slice, and freeze them for up to three months so you can bake whenever you’re ready.
Spotting Peak Ripeness
When you’re ready to bake banana bread without baking soda, the ripeness of your bananas makes all the difference. I’ve learned that peak ripeness indicators tell you everything about your final loaf’s texture and flavor.
Here’s what I look for:
- Bright yellow skin with dark brown or black spots covering the surface
- A strong ripe banana aroma that’s distinctly sweet
- Bananas that yield slightly when gently squeezed
- Skin that’s free of mold or soft bruises
Overripe bananas deliver stronger flavor and moister batter than underripe ones. I mash them until they’re almost liquefied. This approach maximizes moisture and prevents dense texture. Using roughly 3 ripe bananas (300–450 grams total) achieves that desired moist crumb. Skip the baking soda substitute when your banana ripeness is optimal—the natural moisture does the heavy lifting.
Freezing Overripe Bananas
Freezing overripe bananas preserves them for banana bread baking whenever you’re ready. I recommend selecting peak-ripe bananas with brown spots, as they contain more natural sugars. Skip any fruit with bruises or splits.
Here’s my process: peel each banana and slice them into coin-sized pieces. Spread them on a cookie sheet and freeze until solid. This prevents clumping.
| Step | Time | Result |
|---|---|---|
| Slice bananas | 5 minutes | Uniform pieces |
| Freeze on tray | 2-3 hours | Individual slices |
| Transfer to bags | 2 minutes | Ready storage |
Once frozen, I transfer the slices to resealable bags and store them for up to three months. When baking soda alternative banana bread without baking soda, I thaw them first or add directly if the recipe accommodates added moisture in banana bread. This method keeps my thawed banana bread moist and flavorful.
Gather Your Four Core Ingredients

I’m ready to grab four simple ingredients that make this banana bread work without baking soda. You’ll need very ripe bananas with brown spots, room-temperature eggs (they mix in better than cold ones), brown sugar, and self-rising flour, which already has the leavening power built in. That’s it—these four items are your foundation, and everything else is just flavor enhancement.
Banana Ripeness And Selection
Why do bananas matter so much for banana bread without baking soda? Your bananas are literally the star ingredient. They provide moisture, sweetness, and structure—everything your loaf needs to rise and stay tender.
Here’s what I look for when selecting ripe bananas:
- Brown spots visible: These mean peak ripeness and maximum banana sweetness
- Bright yellow color: Shows the fruit’s ready; avoid any mold or dark patches
- Soft texture: The banana should yield slightly to pressure
- Liquid consistency when mashed: Nearly liquefied mashed banana creates the moisture your batter requires
I typically use three to four very ripe bananas, which gives me roughly 330–375 mL of mashed banana. This amount balances moisture with batter structure perfectly. Fewer bananas might alter your outcome, so don’t skimp. Mash them until they’re almost liquefied—this maximizes moisture and prevents a dense loaf.
Eggs And Temperature Requirements
Now that you’ve got your bananas prepped, it’s time to grab your eggs—they’re the glue that holds everything together. I pull my eggs out of the fridge and let them sit for at least 30 minutes. Cold eggs won’t blend smoothly into your mashed bananas, and you want that silky texture. Room temperature eggs incorporate easier and help structure your batter properly.
Once they’re ready, I crack them into the banana mixture and whisk everything together. This is where I add vanilla flavor too, which boosts taste without needing baking soda. Then I fold in my dry ingredients—either self-rising flour or regular flour with baking powder as your baking powder alternative. The eggs do heavy lifting here, providing leavening without soda while binding everything into one cohesive batter.
Sugar And Flour Essentials
The foundation of your baking soda-free banana bread rests on four simple ingredients: ripe bananas, eggs, brown sugar, and self-rising flour.
Here’s what makes each ingredient matter:
- Ripe bananas provide natural sweetness and moisture to your bread
- Brown sugar adds richness and keeps your loaf tender, unlike white granulated sugar
- Self-rising flour combines flour with leavening and salt already mixed in
- Eggs bind everything together while helping your bread rise
Self-rising flour does the heavy lifting here. It’s your secret weapon for baking without baking soda. If you don’t have it, use a flour substitution: combine 1½ cups all-purpose flour with 3 teaspoons baking powder. This gives you the leavening power you need.
Brown sugar truly matters. It locks in moisture better than other options. Your banana bread will stay soft and delicious longer.
Use Baking Powder as Your Leavening Agent

When you skip the baking soda, baking powder steps in as your main leavening agent—the ingredient that makes your banana bread rise. I’ll walk you through your options so you can pick what works best for your kitchen.
| Flour Type | Baking Powder | Salt | Result |
|---|---|---|---|
| Self-rising flour | None needed | Already included | Ready to go |
| All-purpose flour (1 cup) | 1.5 teaspoons | 1/4 teaspoon | Perfect substitute |
| All-purpose flour (2 cups) | 3 teaspoons | 1/2 teaspoon | Doubles easily |
| All-purpose flour (3 cups) | 4.5 teaspoons | 3/4 teaspoon | Larger batch |
Baking powder creates rise through moisture and heat activation. Your moist crumb stays tender thanks to banana and sugar, even though you’ll get a slightly denser loaf than traditional recipes. No metallic flavor here—just pure banana bread goodness.
Mix the Batter Without Overmixing

I’ll walk you through combining your wet and dry ingredients without overdoing it, which is the key to keeping your banana bread tender instead of dense and tough. You’ll want to whisk your mashed bananas, eggs, and sugar together first until they’re well blended, then add your self-rising flour in small batches using a light folding motion rather than vigorous stirring. Stop mixing the moment the flour disappears and a few streaks remain visible—this technique preserves moisture and creates that crumbly texture you’re after.
Combining Wet and Dry Ingredients
Now that your wet and dry ingredients are ready, it’s time to combine them without overworking the batter. I’ll add the wet mixture to the dry mixture in batches, alternating with mashed banana and starting and ending with flour. This method prevents overmixing and keeps moisture evenly distributed throughout your banana bread.
Here’s what I focus on:
- Beat eggs into the banana mixture just enough to blend them together
- Gradually fold in sugar and butter until the mixture is cohesive
- Stop mixing once no large flour pockets remain
- Look for a few small lumps in the final batter
Once combined, I pour the batter into my prepared loaf pan. The baking powder will help it rise properly during baking without needing baking soda.
Avoiding Dense, Overmixed Results
Why does mixing matter so much when you’re making banana bread? Overmixing develops gluten, creating a dense crumb instead of that tender crumb we’re after. I use the muffin-method approach: whisk dry ingredients separately, then lightly combine with wet ingredients. Stop as soon as everything’s blended.
| Mixing Mistake | What Happens |
|---|---|
| Overmixing batter | Dense, tough loaf |
| Stirring self-rising flour too much | Heavy crumb forms |
| Beating wet ingredients excessively | Gluten develops |
| Mixing after adding bananas | Loss of moisture and air |
| Using traditional flour without alternating | Tougher texture |
When using self-rising flour as your baking powder substitute, mix just until combined. Gently fold in mashed bananas and add-ins after the initial wet-dry combination. For traditional flour-and-leavening setups, alternate adding flour with banana, starting and ending with flour. This technique keeps your banana bread without baking soda light and tender every time.
Whisking Technique and Timing
The key to tender banana bread starts with how you combine your ingredients. I whisk room temperature eggs into mashed bananas first, creating a smooth, cohesive wet mixture. This foundation matters because it sets up everything else.
Here’s my whisking technique for success:
- Start with room temperature eggs—they blend seamlessly with mashed bananas
- Use a dry-to-wet mixing method, alternating dry ingredients with banana mixture
- Begin and end with dry ingredients to control hydration evenly
- Mix just until flour disappears—stop immediately after
I avoid overmixing since it creates dense crumb. After combining, I gently scrape bowl sides to eliminate flour pockets, then pour into my prepared pan without further agitation. This gentle folding approach, paired with my baking soda substitute choice, delivers that light texture you’re after.
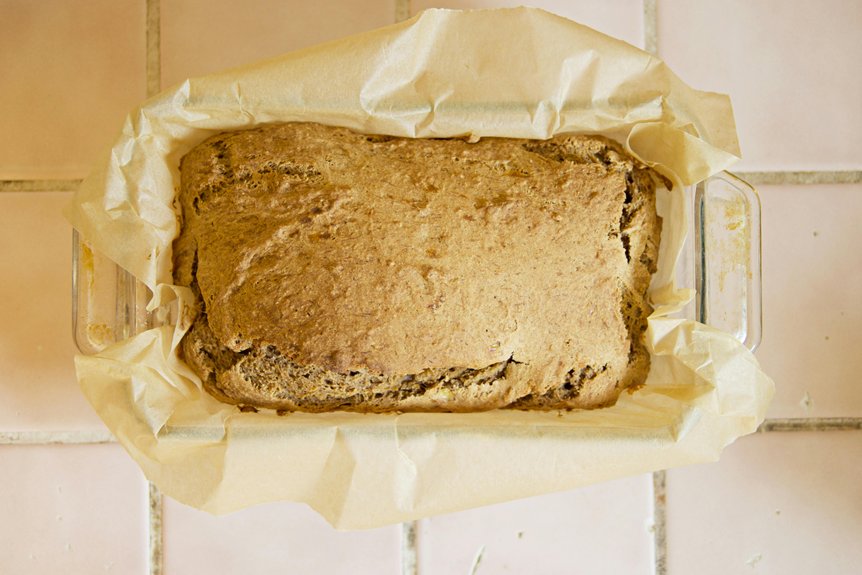
Bake at 350°F Until a Toothpick Comes Clean

Once your batter’s mixed and poured into a prepared 8×4 or 9×5 loaf pan, you’re ready for the oven. Preheat it to 350°F beforehand. This temperature ensures even baking throughout your banana bread. Bake for 55–60 minutes, then check around the 55-minute mark using the toothpick test. Insert a toothpick into the center. If it emerges with just a few crumbs clinging to it, your bread has reached the right doneness. Wet batter means it needs more time. Continue baking in 5–10 minute increments if necessary, testing again until the toothpick comes clean. This method prevents overbaking while keeping your moist bread perfect without baking soda. The loaf pan’s size matters too—it affects baking time significantly.
Fix a Dense Loaf or Undercooked Center

How’s your banana bread turning out—is it coming out too dense or gummy in the middle? I’ve found that a few adjustments make all the difference.
Here’s what I do to fix these common issues:
- Use very ripe bananas with plenty of moisture
- Add self-rising flour or 1.5 tsp baking powder per cup of all-purpose flour
- Avoid overmixing after adding flour for gentle mixing that keeps the crumb tender
- Test doneness at 350°F with a toothpick—it should have a few crumbs, not wet batter
A dense loaf usually means you need more moisture from ripe bananas or better leavening power. If your center stays undercooked, lower your oven temperature slightly and bake longer. The doneness test is your best friend here. Trust it, and you’ll nail the perfect banana bread every time.
Prep Bananas Ahead by Freezing

Freezing bananas ahead of time solves the moisture problem I mentioned earlier—you’ll always have perfectly ripe fruit ready when you want to bake. I peel peak-ripe bananas with brown spots, slice them into coin-sized pieces, then freeze them on a tray before transferring to resealable bags for up to three months. The key is selecting only damage-free fruit; I discard any bananas with bruises or splits. When I’m ready to make banana bread, I thaw the frozen bananas and sim them if needed to reduce excess liquid. This prep method works especially well for baking soda-free recipes since the extra moisture actually helps maintain a better crumb texture. Using the largest bananas possible gives me about 330–375 milliliters of mashed banana per loaf.
Add Chocolate, Spices, or Nuts for Flavor

Why settle for plain banana bread when you can dress it up with flavors you actually enjoy?
I like to boost my banana bread without baking soda by adding simple ingredients that make a real difference. You can fold in up to 1 cup of add-ins after mixing your wet and dry ingredients together:
- Chocolate chips create pockets of richness throughout
- Nuts like walnuts or pecans add satisfying crunch
- Spices such as cinnamon, nutmeg, or cardamom deepen the flavor profile
- Vanilla ties everything together beautifully
Pumpkin puree works great too if you want a moist banana bread with extra depth. The key is folding these additions gently to avoid overworking your batter. This keeps your texture light and tender. These tweaks transform your basic loaf into something your friends will actually request.
Store in the Fridge or Freezer Up to 3 Months

Keeping your banana bread fresh means storing it right, and I’ve found that cooling it completely in the loaf pan before moving it is the first step that actually matters. Once it’s cooled, you’ve got options.
Keeping your banana bread fresh starts with cooling it completely in the loaf pan before moving it.
In the refrigerator, your banana bread stays good for up to 5 days in an airtight container. That’s your go-to for the week ahead.
For longer storage, freezing is your friend. Wrap slices or the whole loaf tightly and freeze for up to 3 months. The texture stays solid when you do it properly.
When you’re ready to eat it, thaw frozen slices overnight in the refrigerator. You can also quickly warm them in a toaster oven to refresh the crumb. Your baking powder creation will taste nearly fresh-baked.