
Yes, you can freeze sugar cookies for up to three months in airtight containers with parchment between layers. Freeze baked cookies after they’ve cooled completely, or freeze dough for three to six months. Decorated cookies work too—just make sure the royal icing dries completely first, which takes eight to twenty-four hours. Thaw them at room temperature while still sealed to prevent condensation from dulling your decorations. There’s more to know about keeping them fresh and handling potential texture changes.
Can You Freeze Sugar Cookies?

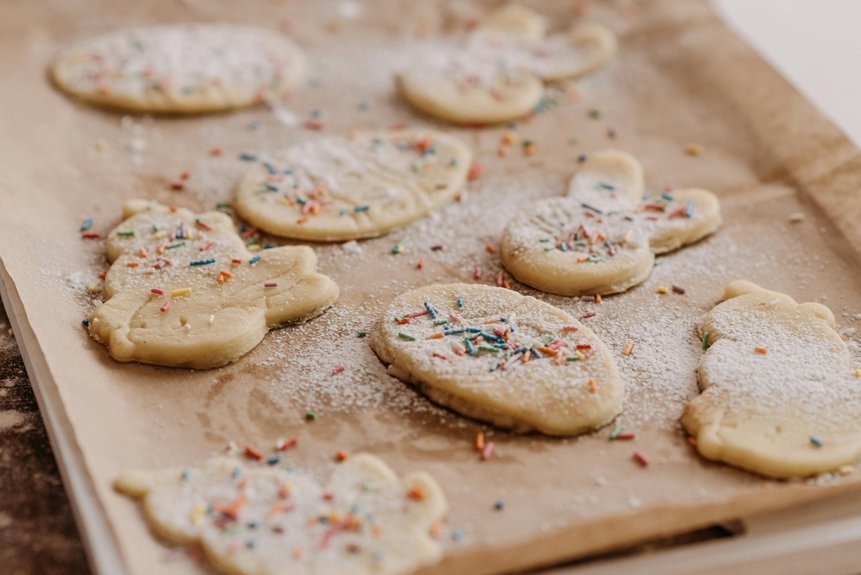
Freezing sugar cookies is totally doable, and it’s a game-changer when you’re baking ahead. You’ve got three solid options depending on your situation.
Most sugar cookies freeze well for up to 3 months when you store them in airtight, freezer-safe containers with parchment between layers. If you’re working with dough instead, you can freeze it for 3–6 months in airtight containers or wrapped discs, then defrost it overnight in your fridge before baking.
Already baked? Fully decorated sugar cookies with royal icing can be frozen if that icing is completely dry. Layer them with parchment and seal them in airtight packaging. When thawing, go slow to avoid condensation that’ll smudge your royal icing. Room temperature works best for naked cookies, while decorated ones need cooler, slower thawing.
Why Freezing Works for Sugar Cookies

Sugar cookies respond really well to freezing because of their simple ingredients and sturdy structure. Their basic composition—flour, butter, sugar, and eggs—holds up beautifully in cold temperatures without falling apart or developing ice crystals that ruin texture.
When you freeze sugar cookies, you’re essentially hitting pause on the decorating process. This lets you bake large batches and decorate them gradually over several days, which saves time and reduces stress. The cold also makes handling easier for big volumes.
To prevent condensation and moisture damage, ensure decorated cookies have completely dry icing before freezing. Layer them with parchment between each cookie and use airtight or heat-sealed packaging. This protects your work and keeps surfaces quality intact, so your cookies stay beautiful when you thaw them later.
How Long Sugar Cookies Stay Fresh Frozen
How long can you actually keep decorated sugar cookies in your freezer? I’ve found that most sugar cookies stay fresh for up to three months in frozen storage. The key? Make sure your decoration dry time is complete before freezing—this prevents icing from getting damaged.
For decorated cookies with royal icing, I use airtight containers with parchment separators between layers. This setup keeps them safe from freezer burn and sticking. Buttercream-decorated cookies are slightly more forgiving during storage.
I’ve had great success with vacuum-sealed bags too, especially when I heat-seal individual cookies for extra protection. The trick is maintaining that airtight seal throughout. When you’re ready to enjoy them, defrost gradually at room temperature while still sealed. This prevents condensation from forming on your beautiful decorations.
Freeze Decorated or Undecorated Cookies First?

Now that you know how to store decorated cookies safely for months, you’re probably wondering whether to freeze your cookies before or after decorating them.
Wondering whether to freeze cookies before or after decorating? The answer depends on your timeline and storage needs.
I’d recommend freezing undecorated cookies first. Here’s why: it’s simpler and more practical. You can bake cookies, let them cool completely, then freeze them naked in airtight packaging. This prevents dehydration and keeps them fresher longer.
When you’re ready to decorate, thaw them at room temperature and add your royal icing. Allow 24 hours for the icing to dry before freezing again if needed.
You can freeze decorated cookies too, but it’s trickier. Fully dried icing needs careful thawing to avoid condensation damage. Starting with undecorated cookies gives you flexibility and control over the entire process, making large batches much more manageable.
How to Prepare Cookies Before Freezing

When should you actually freeze your cookies? The timing matters more than you’d think. I always wait until my cookies have cooled completely. This prevents moisture buildup that makes them soggy.
| Step | Action | Why It Works |
|---|---|---|
| 1 | Cool cookies fully | Stops condensation |
| 2 | Use parchment paper | Prevents sticking |
| 3 | Check royal icing dry time | Avoids smudging |
| 4 | Freeze on sheets first | Maintains shape |
| 5 | Transfer to containers | Saves freezer space |
For decorated cookies with royal icing, I wait 8–24 hours until completely dry. Then I place cooled cookies on parchment paper–lined sheets and freeze until solid. I separate layers with parchment or wax paper to prevent sticking. Finally, I transfer everything into airtight bags or containers. Don’t skip labeling—I write the contents and date on each package. This keeps me organized and ensures I use them within recommended windows.
Best Containers for Freezing Sugar Cookies

What you store your cookies in makes a real difference in how well they freeze. I recommend using airtight, freezer-safe containers like Rubbermaid to protect your decorated sugar cookies from freezer burn. These containers create a protective seal that keeps moisture out.
Inside your container, use parchment separation between cookie layers. This prevents sticking and protects your decorations from getting damaged. I’ve found this simple step makes a huge difference when I pull cookies out months later.
For maximum protection, place your filled container inside a sealed bag or wrap it with cling wrap. This adds another barrier against moisture exposure.
If you prefer bags, choose heat-sealed cellophane options over loose ones. They’re more airtight for long-term freezing.
Finally, label everything with the date. This helps me track storage and use cookies within three months or longer windows.
Layer Sugar Cookies So They Don’t Stick

How do you keep your beautiful decorated cookies from turning into a stuck-together mess in the freezer? I’ll tell you: parchment paper is your best friend here.
Here’s my approach. I freeze naked cookies solid first, then layer them with parchment paper between each one in an airtight container. This prevents sticking during storage and keeps them fresh.
For decorated cookies with royal icing, I’m careful about icing layers. I stack no more than three cookies together. Too many layers create pressure that causes sticking and surface damage.
When I’m ready to defrost, I keep everything in the airtight container. This prevents condensation from forming and ruining that perfect icing work you spent time creating. Simple steps, serious results.
Freezing Royal Icing Decorated Cookies
Royal icing needs to be completely dry before you freeze your decorated cookies—and I mean completely. Let the icing cure for 8 to 24 hours depending on thickness. Once it’s set, you’re ready to protect your work.
Layer each cookie between parchment or wax paper. Consider wrapping individual cookies in cellophane bags for extra security. Place everything in a freezer-safe container and seal it tightly. Wrap the whole thing in cling wrap to prevent freezer burn.
Your decorated cookies can last up to 3 months frozen this way. When you’re ready to enjoy them, defrost slowly at room temperature. This gradual thawing minimizes condensation that could smudge or soften your royal icing designs. Patience here pays off.
Thawing Frozen Sugar Cookies Correctly

I’ll walk you through thawing your frozen sugar cookies the right way, starting with the simplest method: letting them sit at room temperature for a few hours. The key is spacing them out on a tray so they don’t touch each other, and keeping them away from sealed containers that trap moisture and can wreck your decorations. Once they’ve thawed completely, you’ll want to rewrap them promptly if you’re not serving them right away, which keeps that fresh texture locked in and stops any surface moisture from building up.
Room Temperature Thawing Process
When you’re ready to enjoy your frozen sugar cookies, the thawing process matters just as much as the freezing itself. I recommend leaving your cookies at room temperature for several hours until they’re completely soft. This gradual approach prevents condensation from forming on your icing, which can smudge decorations or cause colors to bleed.
Before thawing, remove cookies from their sealed bags and arrange them on a serving plate with space between each one. Keeping them separated lets air circulate around them, which reduces moisture buildup. Don’t let them touch during warming—this protects both the surface and any decorative details you’ve added.
Once your cookies reach room temperature, they’re ready to eat or repackage. This patient method preserves the quality you worked hard to achieve.
Preventing Condensation Damage
You’ve arranged your cookies perfectly on a plate and spaced them out—now comes the part that stops all your decorating work from getting ruined. Condensation is your enemy when thawing frozen sugar cookies. Here’s what I do: I remove cookies from sealed bags before thawing begins. This lets moisture escape gradually instead of pooling on your icing. I keep thawed cookies in a cool, dry spot away from humidity. When they’re ready, I place each cookie on parchment paper with space between them. They shouldn’t touch during warming. Once fully thawed, I promptly pack them into airtight containers to lock in that fresh-decorated look and prevent moisture from sneaking back in fast.
Timing And Storage Considerations
How long should you actually leave those cookies out? I’d recommend bringing frozen sugar cookies to room temperature gradually—this takes a few hours depending on your kitchen’s warmth. Here’s what works best for me:
- Remove cookies from sealed packaging only after they’ve thawed completely to prevent sogginess
- Place naked cookies in their container during thaw, avoiding stacking that damages surfaces
- Keep decorated cookies in packaging in a cool, dry spot to dodge condensation trouble
- Repackage promptly after thawing if you’re not eating them right away
For storage, I freeze decorated cookies up to three months when sealed airtight with parchment layers between them. Before any decorating or reassembly, ensure full thawing happens. If you’re not consuming immediately after thaw, return them to airtight storage. This approach keeps your cookies fresh and your baking efforts protected.
Stop Condensation From Ruining Frozen Cookies

Condensation is one of the sneakiest enemies of frozen cookies—it sneaks up when you thaw them and can smear your icing or soften your decorations before you even notice it’s happening. I’ve found that using airtight containers or vacuum-sealed bags works best. Here’s what I do: I layer parchment paper between cookies to create barriers against moisture. Before freezing, I wait 8–24 hours so my icing-dry completely, preventing moisture transfer that ruins designs. When I’m ready to thaw, I keep cookies sealed in their container at room temperature. This gradual approach stops sudden condensation from forming on surfaces. Avoiding open containers during defrosting makes all the difference in keeping your cookies looking fresh and tasting great.
Refreezing Cookies After Thawing

Once you’ve thawed your decorated cookies and kept that condensation at bay, you might wonder if you can pop them back in the freezer. The answer is yes, but you’ll want to do it right.
Refreezing works best when you:
- Ensure your royal icing is completely dry before freezing again
- Use airtight packaging with parchment between layers to prevent sticking
- Return cookies to the deep freeze quickly, avoiding repeated door-opening
- Test a small batch first to check texture and icing stability
The key is minimizing moisture and icing bloom during the thawing and freezing cycle. Fully decorated cookies need extra care since their icing can soften or smudge. Heat-sealed or vacuum-sealed storage helps here. Work quickly, keep everything dry, and you’ll extend your cookie batch’s life significantly.
How Freezing Changes Sugar Cookie Texture

When you freeze sugar cookies, I want you to know that the texture changes noticeably—they tend to soften rather than stay crisp, since freezing halts the moisture loss that keeps freshly baked cookies crunchy. During storage at 0°F or below, the cold actually homogenizes your cookies’ texture, making the interior and exterior more uniform and less distinct than they were before freezing. When you thaw them later, this process affects how crisp they become, so you’ll notice your cookies won’t have quite the same snap they had straight from the oven, though naked cookies without frosting tend to hold up better than decorated ones.
Freezing Softens Cookie Texture
Because moisture moves around inside cookies during freezing, you’ll notice they come out softer than they went in. This happens because water redistributes throughout the cookie during the freeze-thaw cycle, reducing that crispy texture you might’ve wanted.
Here’s what you’re really looking at with texture changes:
- Naked, fully cooled sugar cookies stay softer longer after freezing due to moisture retention
- Freezing can actually help unevenly baked cookies become more uniform across your batch
- Royal icing toppings may become slightly tackier or glaze-moist when thawed
- Proper airtight packaging with minimal layering prevents extra moisture loss or condensation
The good news? You can control this. Store your cookies in airtight containers and they’ll thaw with predictable softness. Understanding these texture changes helps you freeze sugar cookies strategically for your needs.
Texture Homogenization During Storage
Beyond just softening, freezing actually works to even out the texture differences across your entire batch of sugar cookies. When you freeze cookies at consistent temperatures, their sugar cookies texture becomes more uniform throughout the batch. Some cookies might’ve baked slightly faster or slower, creating varied crispness levels. Freezing texture changes level the playing field, so you get predictable results when you thaw and decorate them later. Proper moisture control plays a huge role here. Store your fully cooled cookies in airtight packaging with parchment layers between them. This setup prevents moisture from redistributing unevenly during storage. You’ll notice that cookies frozen promptly retain their character better than those sitting out first. The freezer essentially pauses any texture drift, giving you consistent sugar cookies ready for decorating whenever you need them.
Thawing Affects Crispness Levels
how you bring them back to room temperature actually matters more than you’d think. I’ve learned that slow thawing at room temperature preserves crispness way better than rushing the process. When you thaw too quickly, condensation builds up on your cookies’ surfaces, making them soft and chewy instead of crisp.
Here’s what I recommend doing:
- Let cookies sit at room temperature for 30-60 minutes before eating
- Keep them in their airtight container during thawing to control condensation
- Avoid the microwave or warm spots in your kitchen
- Allow them to reach full room temperature before decorating
The patience pays off. Your cookies’ll regain that satisfying snap you’re after, and you’ll taste the difference that proper thawing makes.
Decorating Cookies After Thawing

When you’re ready to bring your frozen cookies back to life, thawing them correctly sets you up for success. I bring my cookies to room temperature slowly to avoid condensation that smudges icing. This patient approach keeps your decorations intact.
Here’s where it gets fun: thawed cookies are actually receptive to new designs. You can add fresh decorations or completely re-decorate if you want a different look. Just ensure your royal icing dried fully before freezing, and handle thawed cookies gently so you don’t compromise that surface.
If your cookies look dull after thawing, I refresh them in a 300°F oven for 5–10 minutes. This optional step restores moisture and crispness. Layer parchment between cookies during storage to prevent sticking and protect your handiwork throughout the entire process.
Troubleshooting Common Freezing Problems

When you thaw your frozen sugar cookies, condensation can form on the icing and ruin all your decorating work, so I keep mine in airtight packaging while they warm up to room temperature. You’ll also want to freeze your baked cookies on parchment sheets first, then vacuum seal them to prevent freezer burn and keep them fresh for months. The key is moving slowly—thaw in a cool, dry spot and avoid stacking too many decorated layers (stick to about 3 max) so the icing doesn’t get damaged or sticky.
Condensation And Icing Damage
Moisture is the real enemy when you’re freezing decorated cookies. When you pull frozen cookies from your freeze space, condensation forms on the surface. This happens because warm air meets cold icing, and that moisture ruins your hard work.
Here’s what goes wrong with condensation and icing:
- Your royal icing gets a dull surface sheen instead of that beautiful shine
- Fine details soften and lose their crisp edges
- Colors blur together, especially on intricate designs
- Frosting becomes sticky and messy
The fix? Defrost slowly in a cool environment. Don’t open containers immediately after removing them from the freezer. Wait at least an hour. Also, ensure your icing is fully dry before freezing—that’s 8 to 24 hours depending on thickness. Use parchment barriers between decorated layers too. These steps protect everything you’ve created.
Freezer Burn Prevention Tips
Freezer burn happens when ice crystals form on your cookies’ surface, creating those grainy, discolored patches that nobody wants. I’ve found the best defense is using airtight containers or vacuum-sealed bags. These seal out air, which is the main culprit behind freezer burn.
Here’s what works: place parchment between layers to prevent sticking, then wrap your container in cling film for extra protection. Keep layers shallow—three maximum for royal icing—and ensure your seal is genuinely tight. Don’t overfill bags, as this compromises the seal and invites air inside.
Label everything with contents and date. Aim to use cookies within three months; longer storage increases freezer burn risk and texture changes. These condensation prevention steps protect your treats and maintain quality you’ll actually enjoy eating.